A few months ago we got Pi-hole and Homebridge up and running in our current house. The goal was to test them out and see if they would be a good fit for a new, dream house. In that same spirit, we went ahead and ordered AlarmDecoder so that we could hook up our existing DSC alarm to Homebridge as well. While the installation process was a bit more intimidating than Pi-hole, it was still approachable and has been working out well for the past week. We’ve documented some of the pros, cons, thoughts and references for when we revisit this during the new house build.
SETTING UP ALARM DECODER
We went with the all in one network appliance, and setup was as easy as the quick start guide suggested. In summary:

Connecting to the alarm panel.
- Turn power off and hook up the 4 wires to the alarm panel and to the network appliance.
- Connect an Ethernet cable from our switch to the network appliance.
- Plug in the network appliance and turn power back on.
- Navigate to http://alarmdecoder.local and follow the instructions.
While working with the DSC board looks intimidating, it is actually quite simple. Just strip the wires a bit, and slightly unscrew the screw where you want to connect. In our case: red, black, yellow and green. Push the wire in, and then tighten the screw while making sure the wires stay in.
NoteA wire cutter will make stripping the wires easier. Also consider the DC Power Adapter for redundancy.
Quite surprisingly, http://alarmdecoder.local just worked after we connected to the network and supplied power.
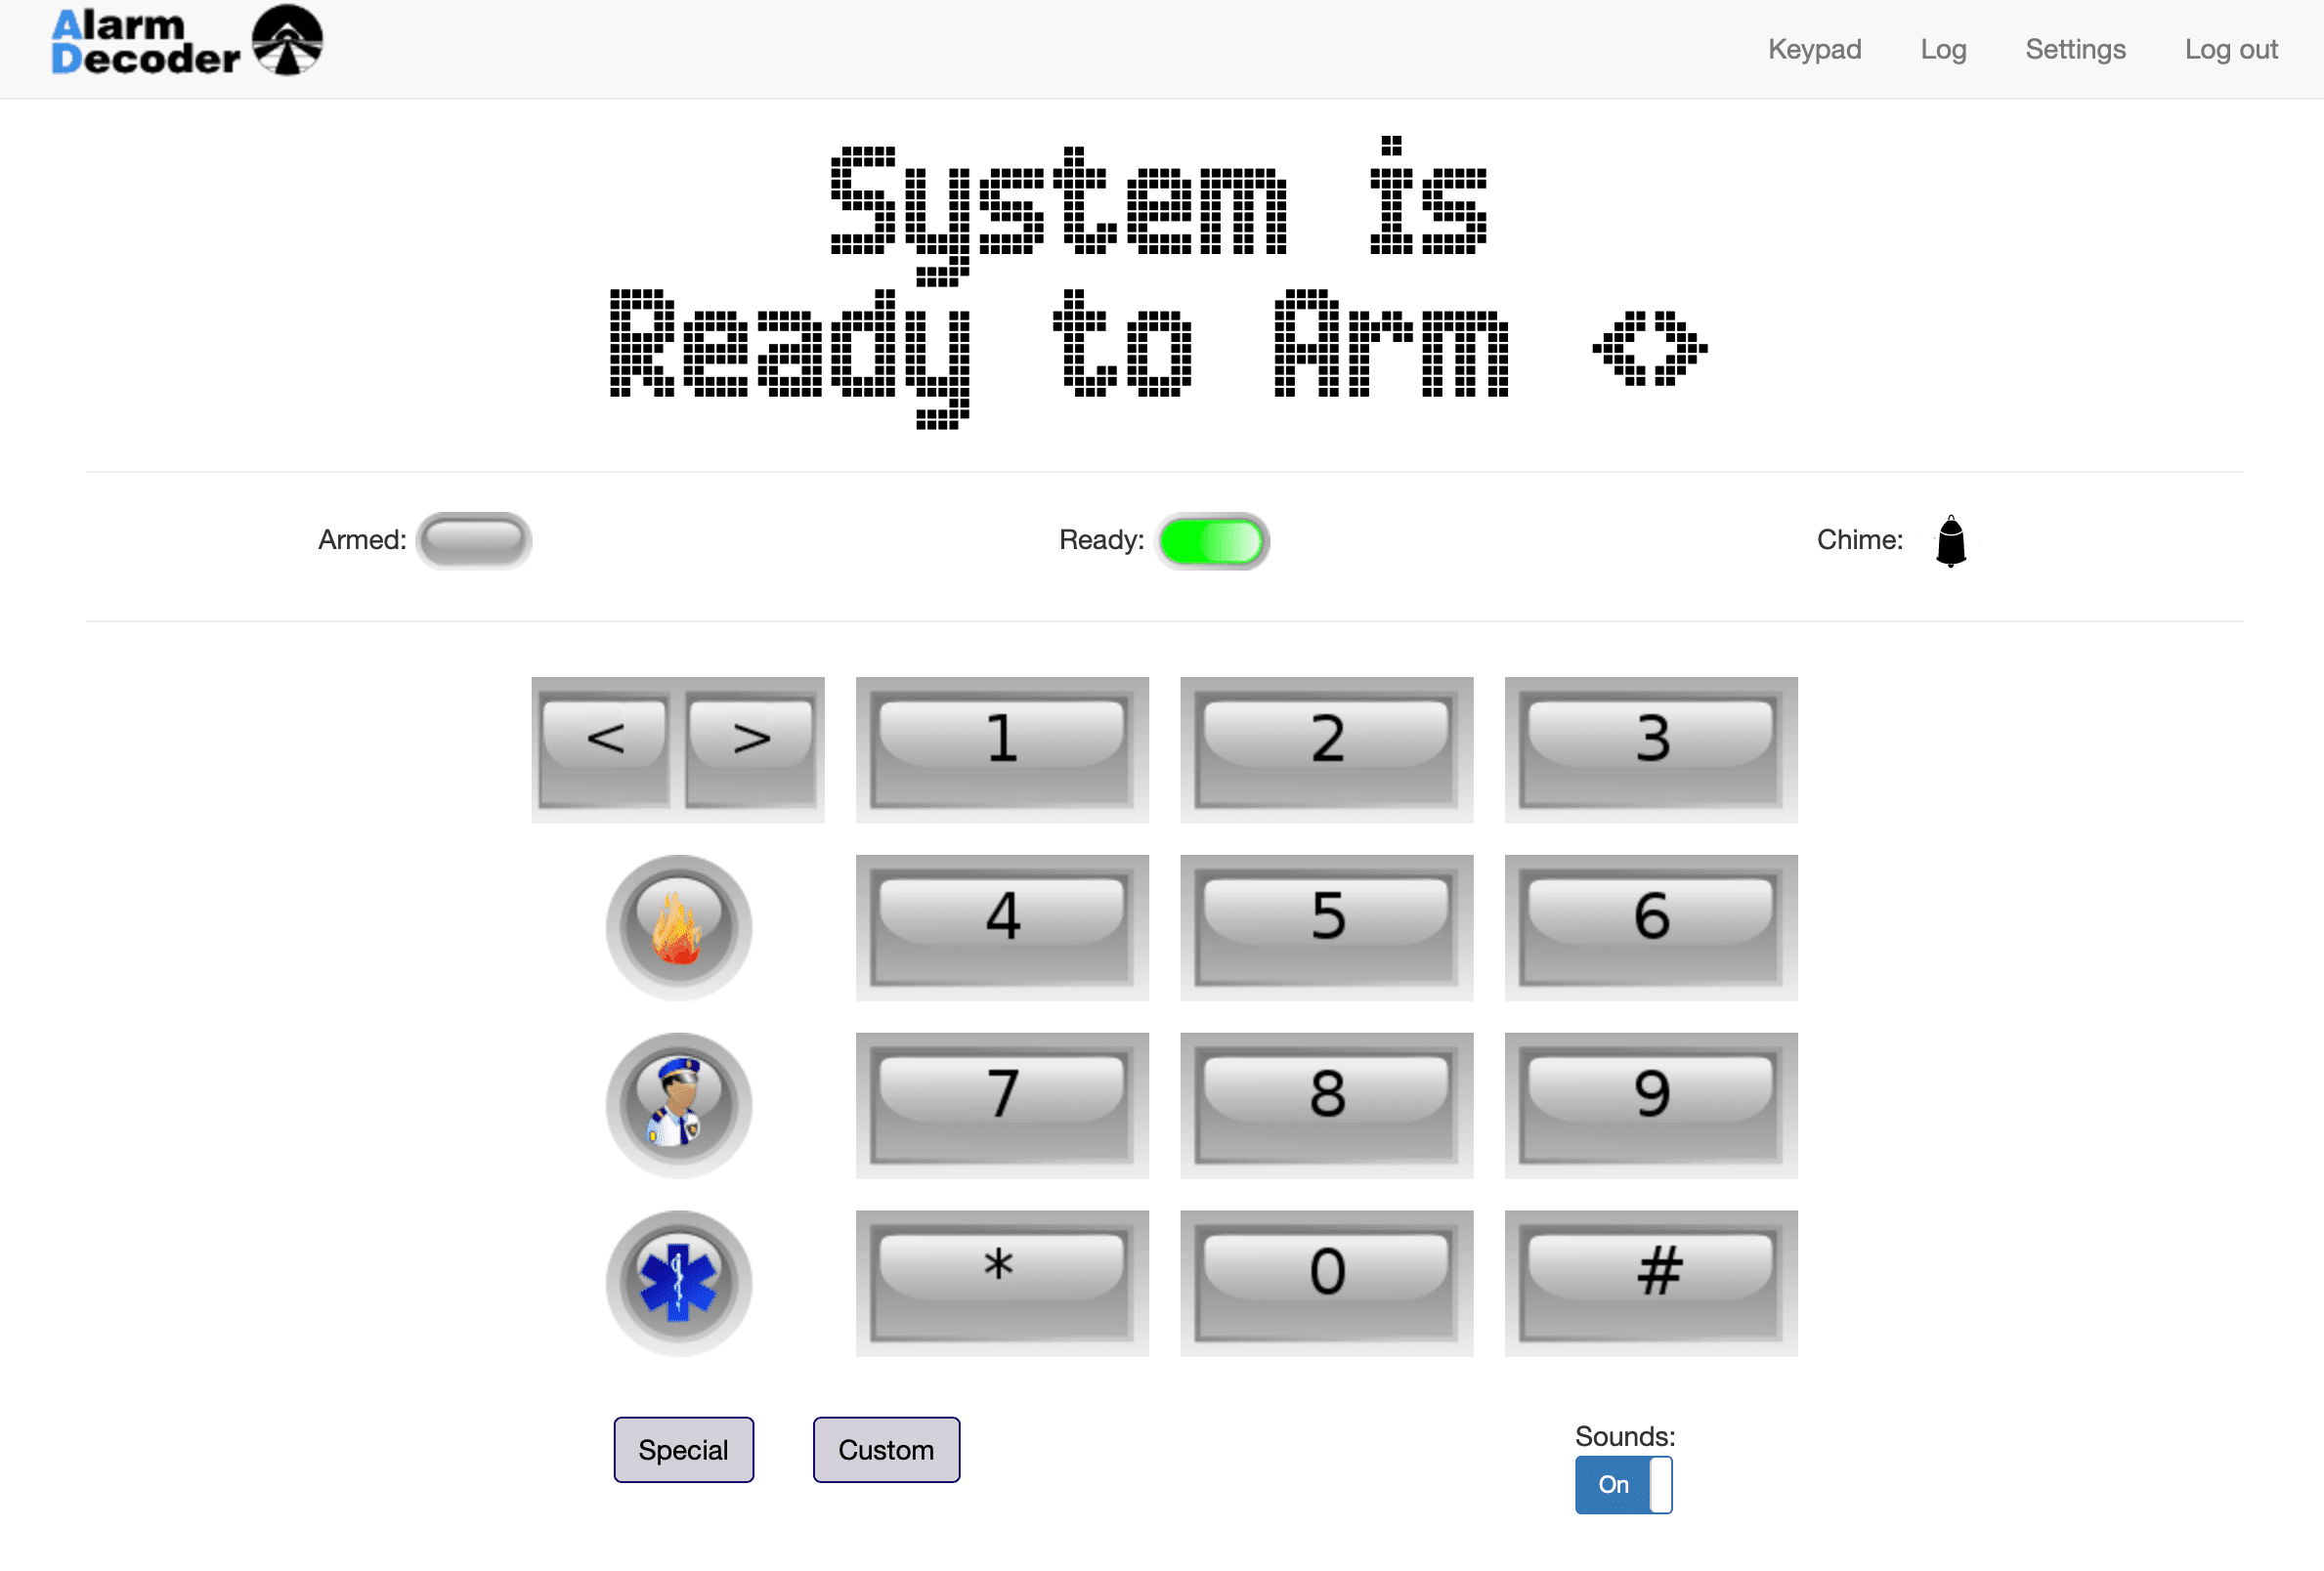
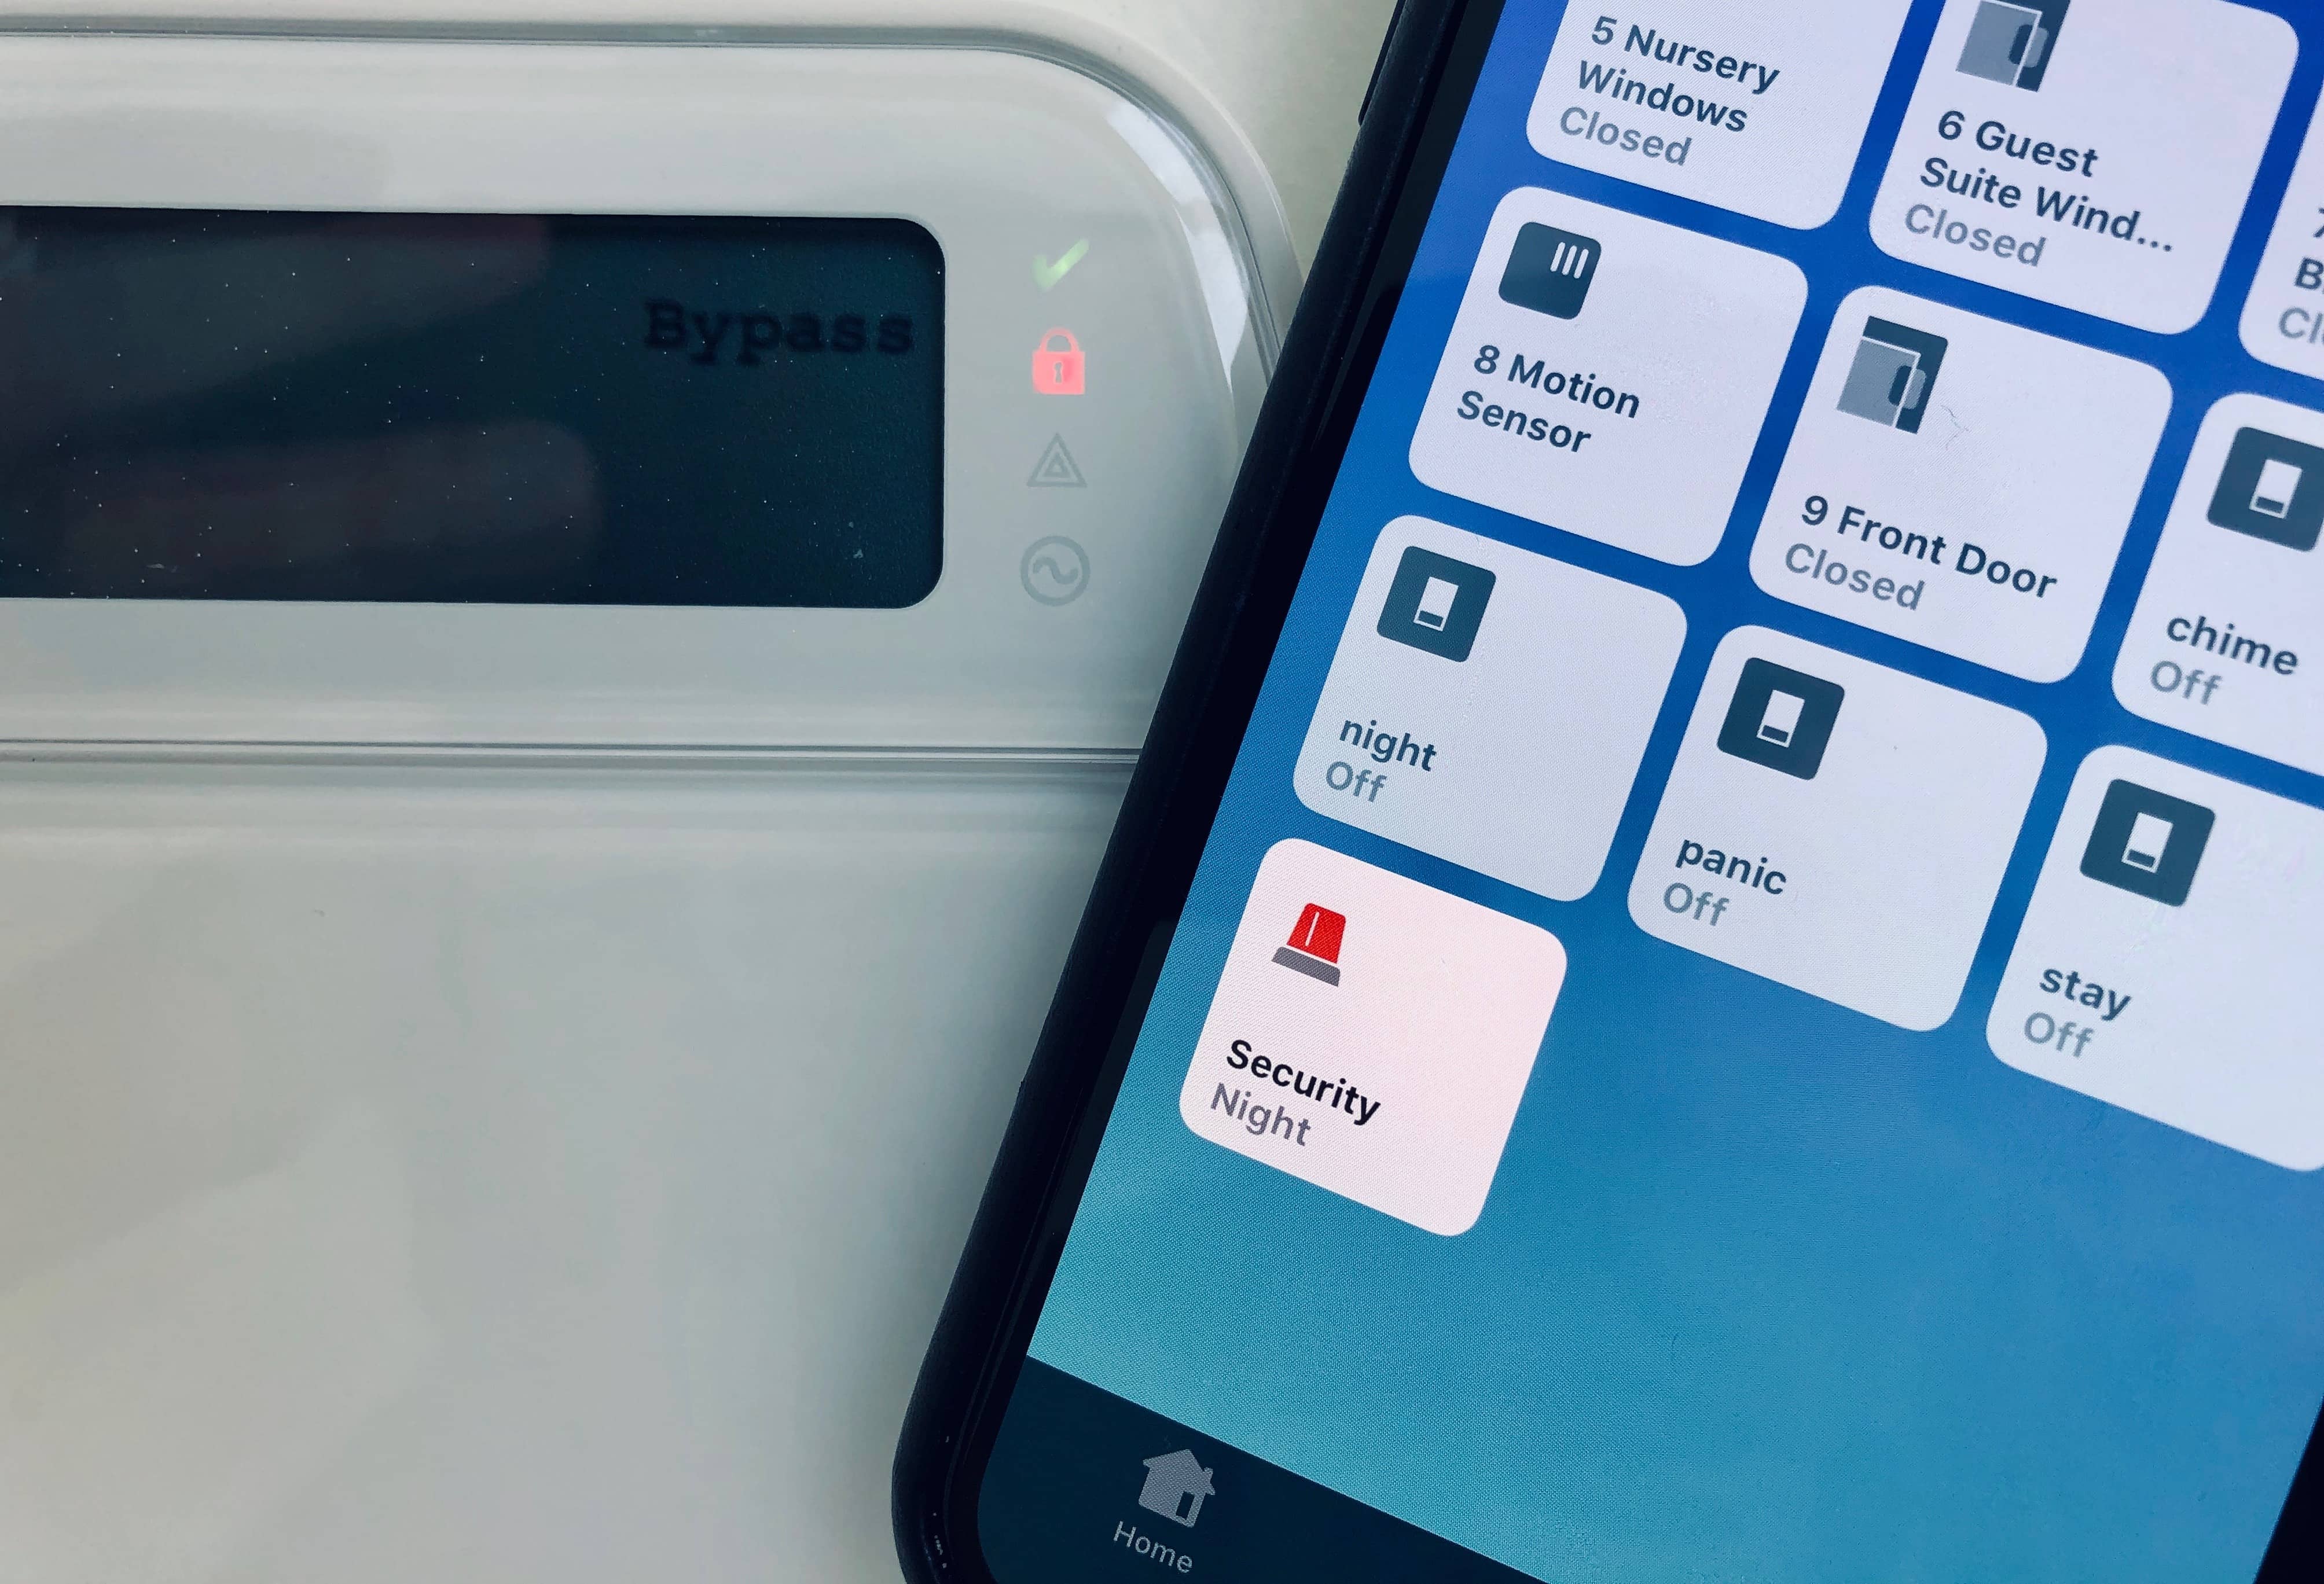
Alarm Decoder Web Interface
They keypad greets you and matches the state of the physical keypad. There are also a ton of features that are worth going through. Most important for us was to setup notifications, so that we now receive emails and text messages when the alarm has been tripped. You can also create custom buttons, such as “Bypass Zone 3” and map it to custom key commands like “*103#”. The key commands are so archaic and they can be easy to forget, so this helps with handy shortcuts. Finally, we do have to mention the one limitation of AlarmDecoder – it is not very responsive. It can take 10+ seconds to get the accurate state of the alarm system on first load. This is still acceptable for us though since all of the automation has been rock solid, which means we rarely have to work with the UI.
Connecting AlarmDecoder to Homebridge
Running AlarmDecoder on Homebridge requires the homebridge-alarmdecoder-platform. The instructions on the README are fairly accurate, but we’ve also documented the specifics below along with any weird issues. Of course, when this article is out of date, cross reference it with the latest README instructions.
SSH into the Raspberry Pi that you have running Homebridge.
ssh pi@YOUR.PI.IPADDRESSInstall alarm decoder platform.
npm install -g git+https://github.com/aficustree/homebridge-alarmdecoder-platform#masterSet up API Key in the AlarmDecoder web app.
Settings -> Advanced -> API -> Manage API Keys -> GenerateSet up push notifications in the AlarmDecoder web app.
Settings -> Notification -> NewWhen you have to select the types of notifications, make sure everything on this list is selected. Then, for URL, a fake example would be 192.168.0.1:8888. But, replace the IP with your Homebridge IP, and the port can either be 8888 or whichever port you specified. The path is also required, and for that / is all you need. Finally, set the method to POST.
Then, set up or edit your existing Homebridge config file. Back in terminal where you SSH’d into the Raspberry Pi running Homebridge:
cd ~/.homebridge
nano config.json
From there, place your new platform configuration. The DSC starter template gets you most of the way. Just add local values for: port, key and setPin. Also set the API URL’s to the IP of your AlarmDecoder, or to alarmdecoder.local.
Next, run Homebridge from the command line.
homebridgeWhen Homebridge starts, you’ll see the text output of all of the devices that have been added. If you open your Home app, you will now see a bunch of new sensors. Everything worked as expected except for:
- If you have an open zone that requires a bypass, you can still set the alarm in the Home app. However, the alarm is not actually set. The home app wrongly thinks it is, and it will change the during the next refresh. To properly set, make sure the green check mark is showing on the panel before interacting with the Home app.
- On the physical keypad, the Stay button is instant. Using Stay through the Home app goes through a 30 second count down before arming.
Lastly, make Homebridge run on startup in case your Raspberry Pi reboots. We had to run as sudo.
sudo npm install -g pm2
pm2 startup

/// Follow on screen instructions, which at the time of this writing are to run
/// sudo env PATH=$PATH:/usr/bin /usr/lib/node_modules/pm2/bin/pm2 startup systemd -u pi --hp /home/pi

pm2 start homebridge
pm2 save

/// Test everything works
sudo reboot
After a reboot, verify that you can still see everything with an accurate status in the Home app. You can also verify the process is running by SSH’ing back in and seeing if the process exists:
ps -A | grep homebridge
491 ?        00:08:45 homebridge
IS THIS REALLY THE BEST OPTION?
If you’re like us and already have a DSC alarm system installed then this approach seems to be the clear winner. For $150 you get a fairly easy to set up smart home security system with no monthly fee. Another option that is a bit interesting is the Honeywell Lyric Controller, which has full Homekit support built in. If starting from scratch, you can just buy all Lyric compatible wireless sensors and get this unit for $250. Going this route would be a bit easier to maintain than AlarmDecoder, but it looks like it also might require a monthly subscription to keep getting firmware updates. It also looks like converting a DSC system to Lyric is not supported, but it is possible with a hardwired to wireless converter to handle your wired sensors, and a wireless converter for your existing wireless sensors. One user details:
“I replaced the 3 door sensors with the Honeywell ones, and I purchased a wireless to wireless translator from Revolution Products. This allowed me to re-use the DSC branded window sensors (22 of them) with the Honeywell panel. Works great!”
Another interesting option is Abode. They don’t currently support Homekit, but they say they are 100% committed to it. Functionally it is about the same as a Lyric system, but it looks more polished. A bit more research is needed, but it’s worth keeping an eye on.
Lastly, we could go with a true DIY system. This simple example details the rough idea – buy Homekit compatible door and motion sensors, and use IFTTT to create rules in which a Homepod would make siren sounds. Taking that idea, you could imagine how it could be expanded into all sort of custom logic. The only downside with this approach would be that there is no keypad or arming mechanism.